Easter Pictures Easy to Draw Easter Pictures
Easter is one of the most colorful and widely celebrated holidays in the world. Every year, millions of excited kids around the world wake up on Easter morning to chocolate treats and colorful egg hunts.
These eggs are said to be delivered by the Easter Bunny, a very busy rabbit that makes Easter magic happen!
This holiday is special to many people, and fans of the occasion may like to know how they can learn how to draw the Easter Bunny.
If you are one of those Easter devotees, then this will be a tutorial that will help you to properly celebrate this wonderful occasion.
Our step-by-step guide on how to draw the Easter Bunny in just 6 easy steps will show you how fun and easy drawing this jolly rodent can be!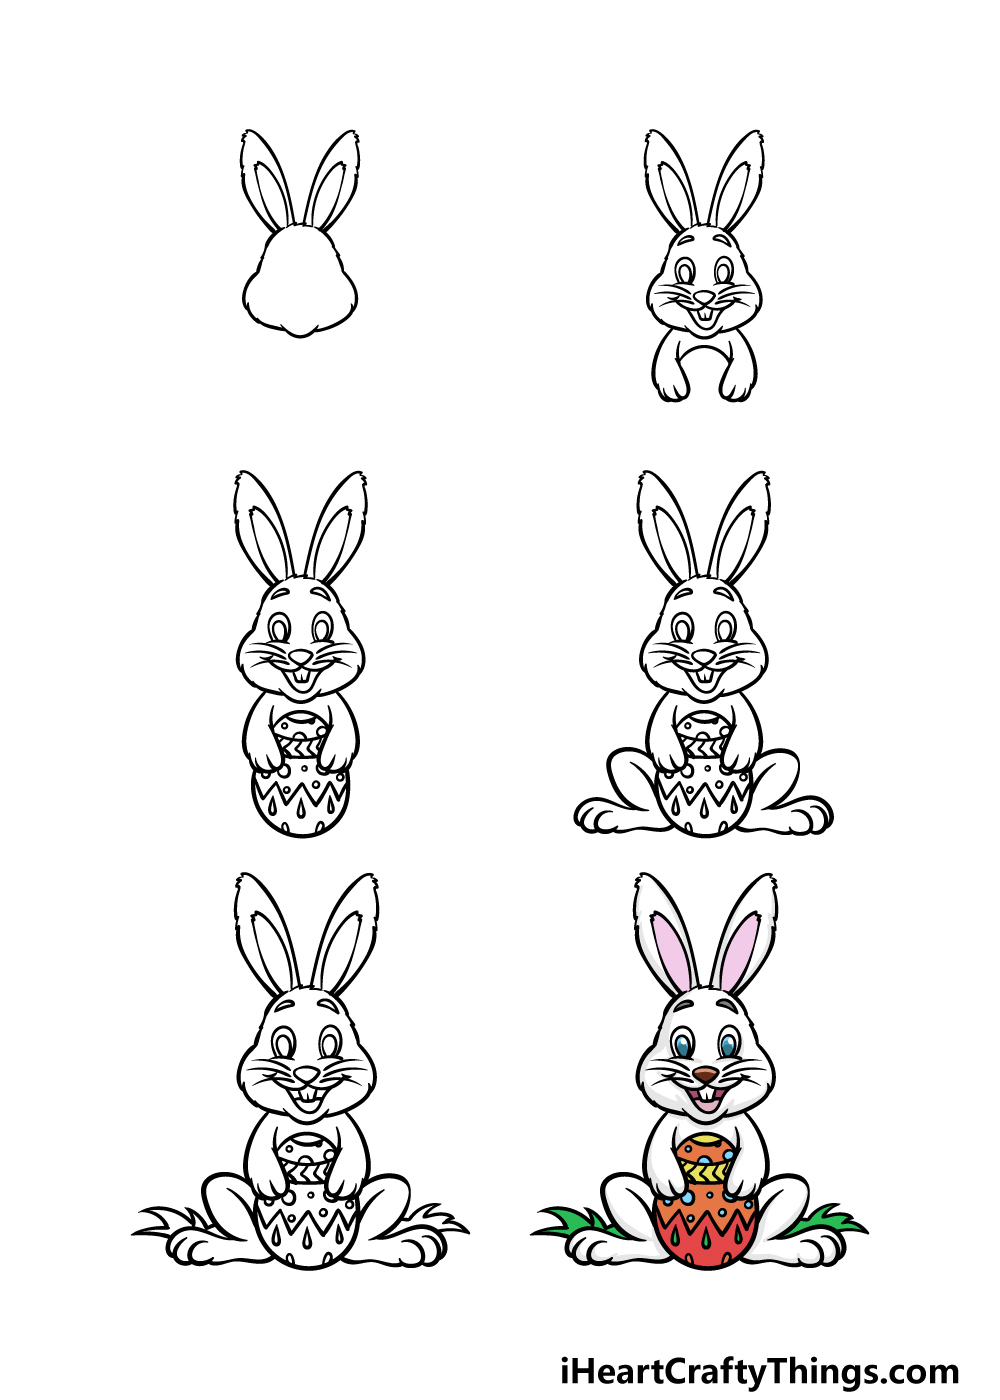
What's in this Blog Post
- How to Draw The Easter Bunny – Let's Get Started!
- Step 1
- Step 2 – Now, draw some facial details and arms for the Easter Bunny
- Step 3 – Draw the rest of the Easter egg it is holding
- Step 4 – Next, draw the legs for the Easter Bunny
- Step 5 – Add the final details to your Easter Bunny drawing
- Step 6 – Finish off your Easter Bunny drawing with color
- Here's how you can make your Easter Bunny drawing even better…
- Your Easter Bunny Drawing is Complete!
How to Draw The Easter Bunny – Let's Get Started!
Step 1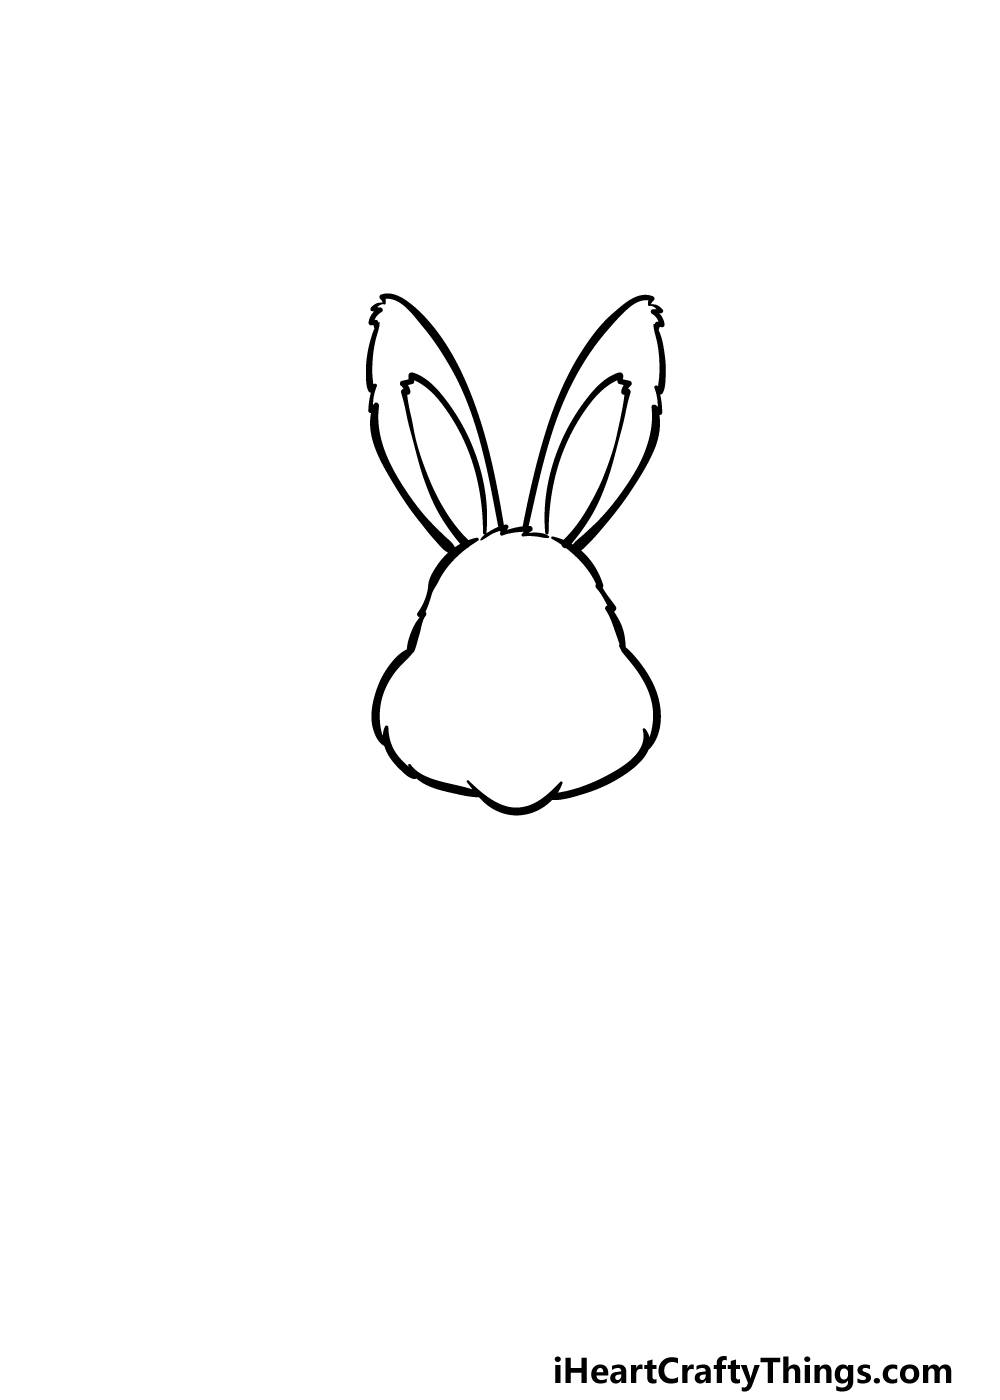
We will begin this guide on how to draw the Easter Bunny with the outline of the head and ears. When drawing any of the outlines for the bunny, we will be using a slightly jagged line.
Using this instead of a smooth line will help to ensure that the bunny looks nice and fluffy. Draw the outline for the head with a thinner round shape for the top half and a thicker portion for the lower half.
Then, use two long, thin and rounded shapes for the outlines of the ears. Finish these off by drawing some thin oval shapes inside of them for the inner ears, and then we can move on to step 2.
Step 2 – Now, draw some facial details and arms for the Easter Bunny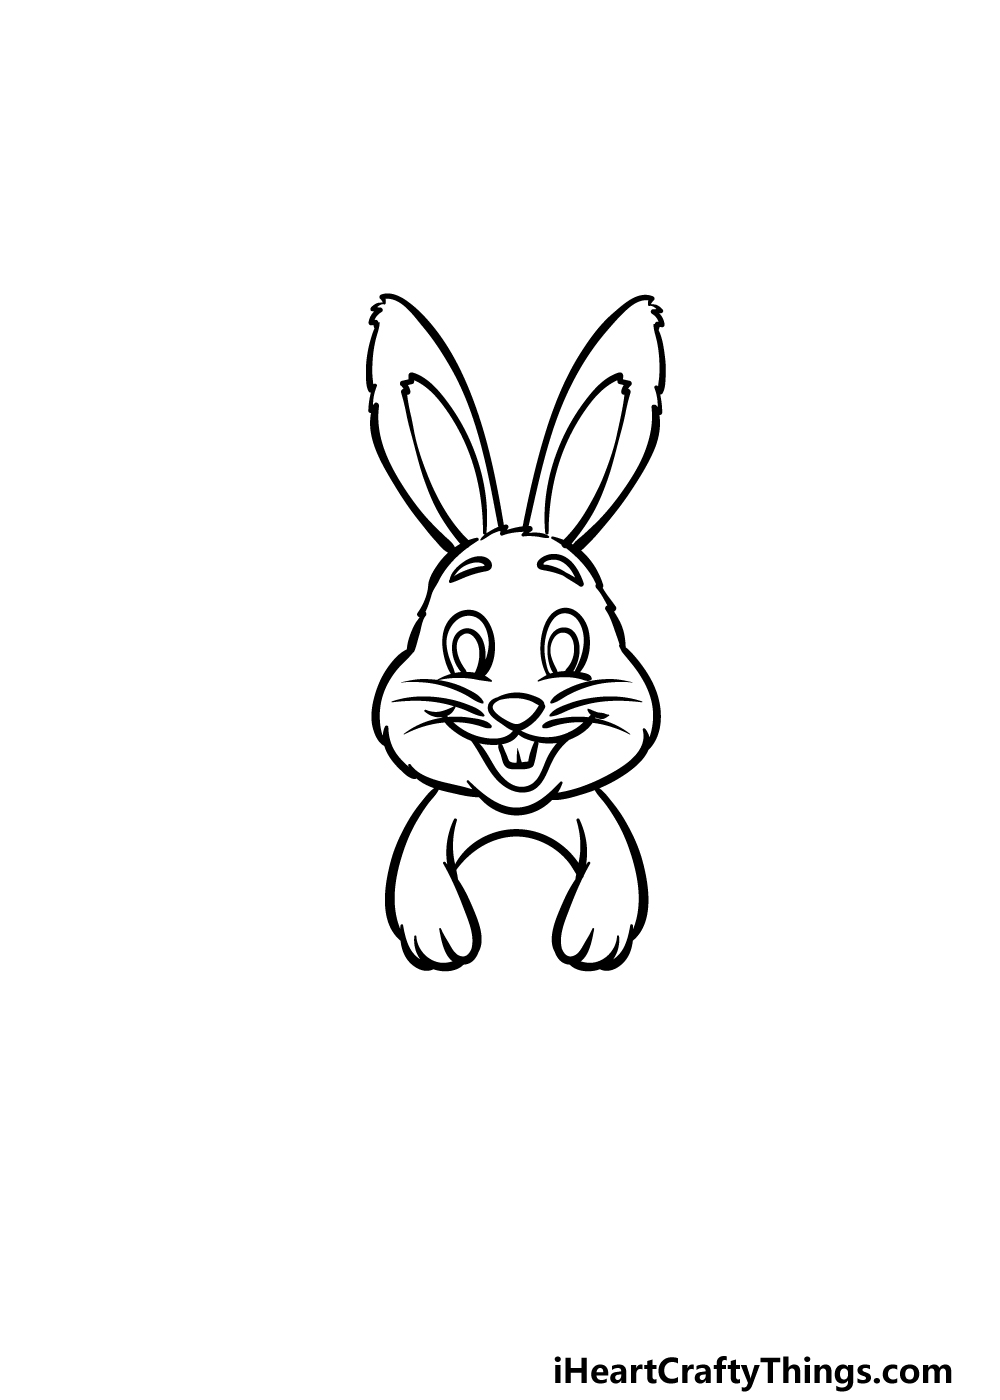
Now that you have the outline for the head and ears done, we can focus on some details as well as adding the arms for your Easter Bunny drawing.
For the eyes, draw some small oval shapes that have some even smaller round shapes within them.
Then, there will be a rounded triangular nose beneath the eyes, and this will have some curved lines coming out from the bottom for the smiling mouth.
Add some squared teeth to the roof of the mouth, and then draw the bottom of the open mouth.
Finally, use some more of those jagged lines for the furry arms of the Easter Bunny dropping down.
Connect these with a rounded line near the top of the arms for the tip of a large egg the bunny will soon hold.
Step 3 – Draw the rest of the Easter egg it is holding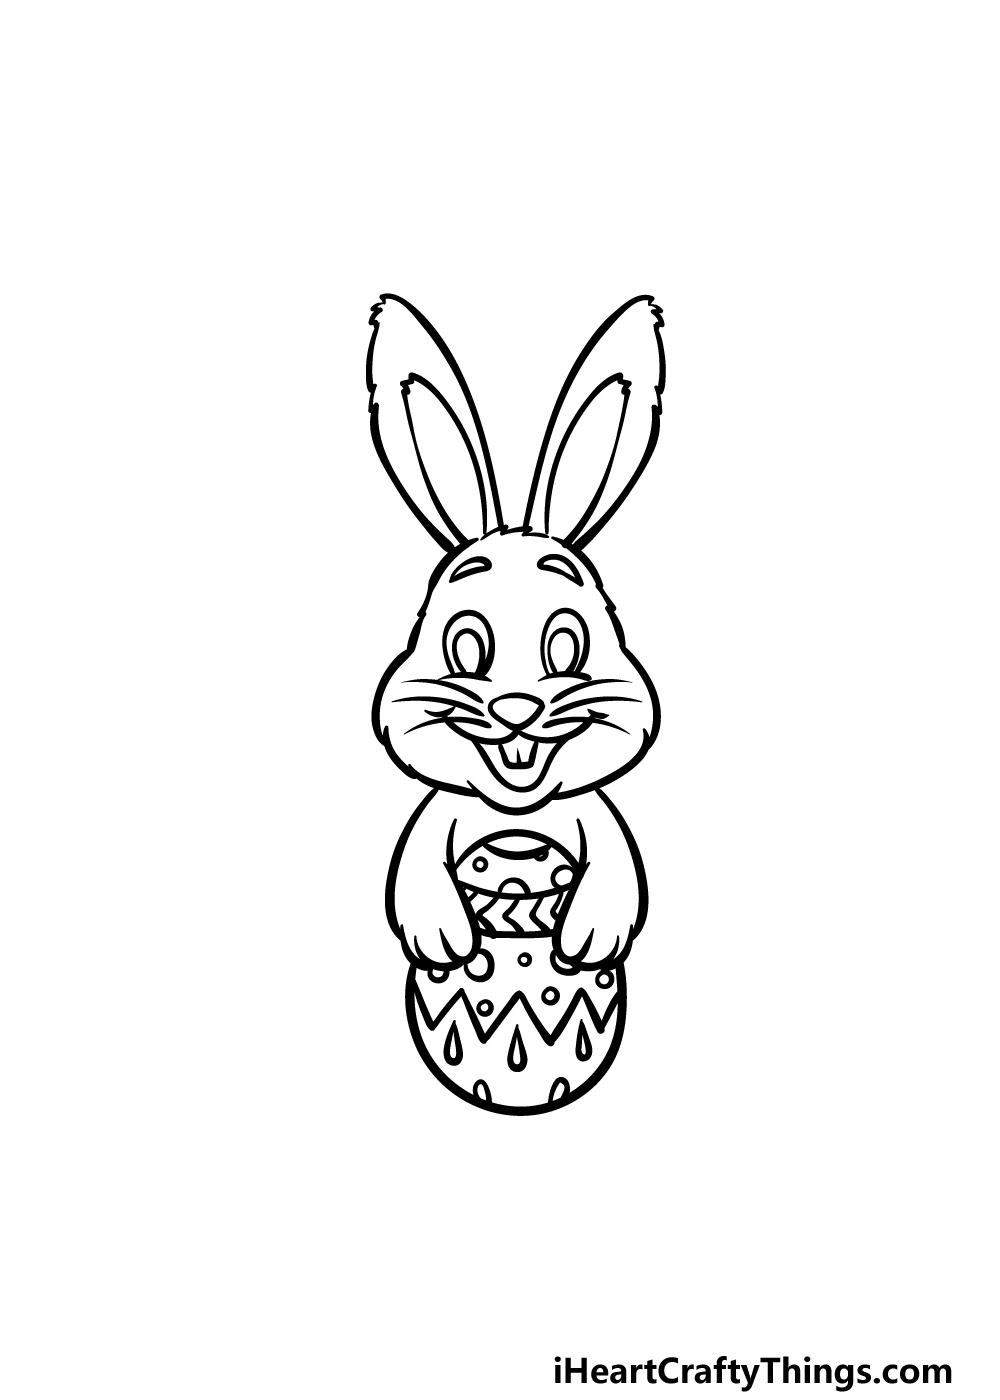
It wouldn't be much of an Easter image without a big, colorful Easter egg!
For that reason, we will be adding the rest of the egg you started drawing in the previous step of our guide on how to draw the Easter Bunny.
First, use a rounded line to draw the bottom half of the egg in a way that makes it look like it would connect to the tip you drew previously.
Then, it will just be a matter of decorating the egg! We used some pointy lines, small circles and other shapes to decorate our example, but you could decorate it in any way that you like!
Step 4 – Next, draw the legs for the Easter Bunny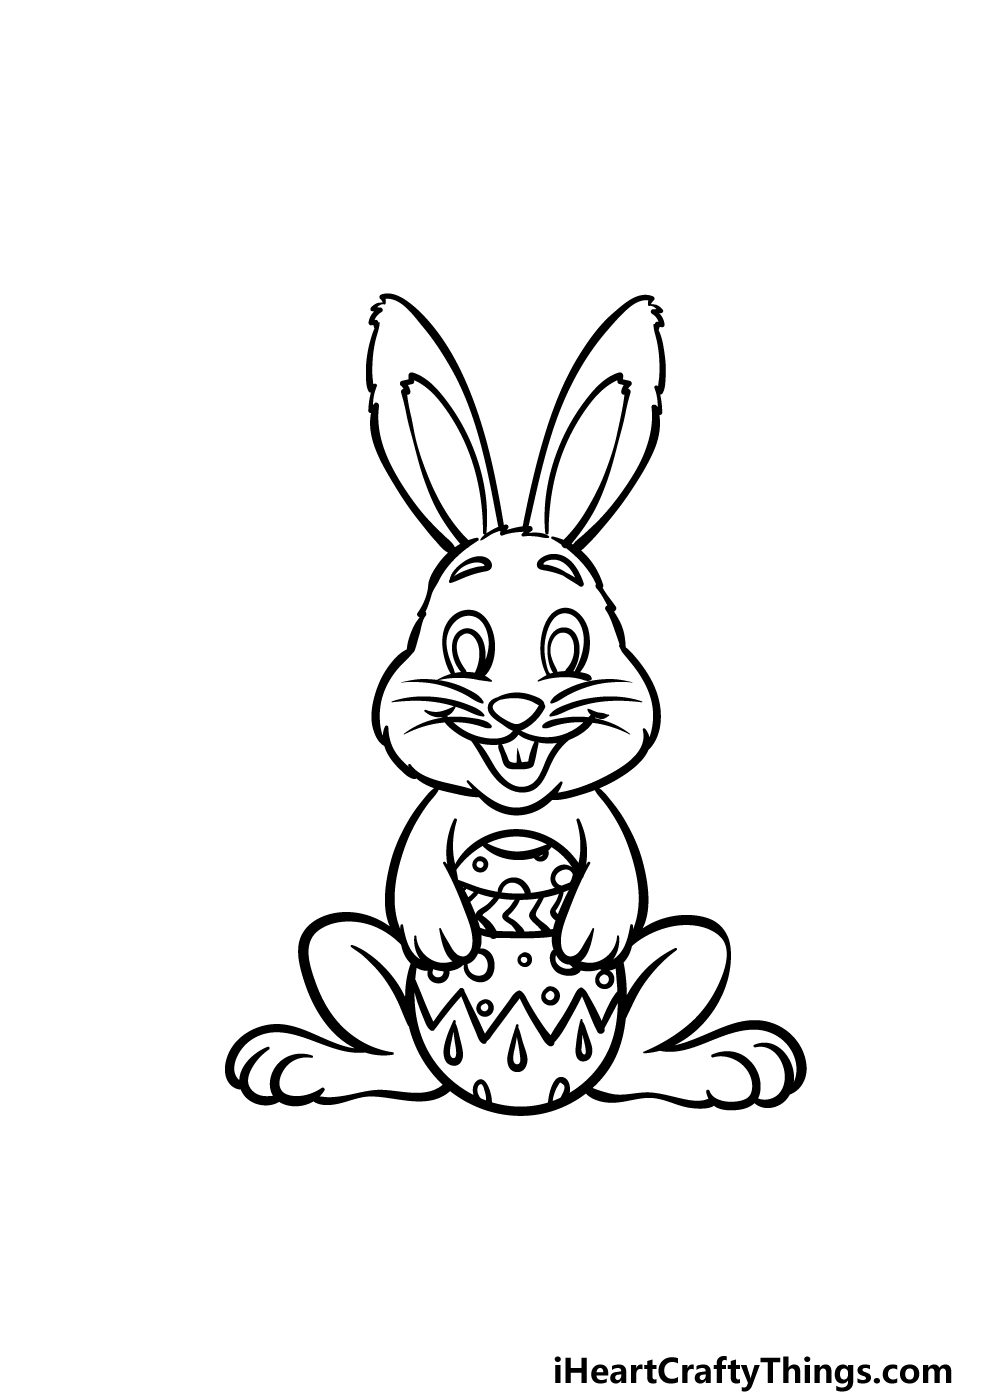
We will be finishing off the outline for the bunny in this part of your Easter Bunny drawing. That will have you ready for the final details in the next step of the guide.
We will mainly be focused on the legs of the bunny in this step, and you can draw the legs using some sharply curved lines.
Then, draw the long, flat feet of the bunny with some smaller rounded lines for the toes. You'll then be ready for those final details in the next step!
Step 5 – Add the final details to your Easter Bunny drawing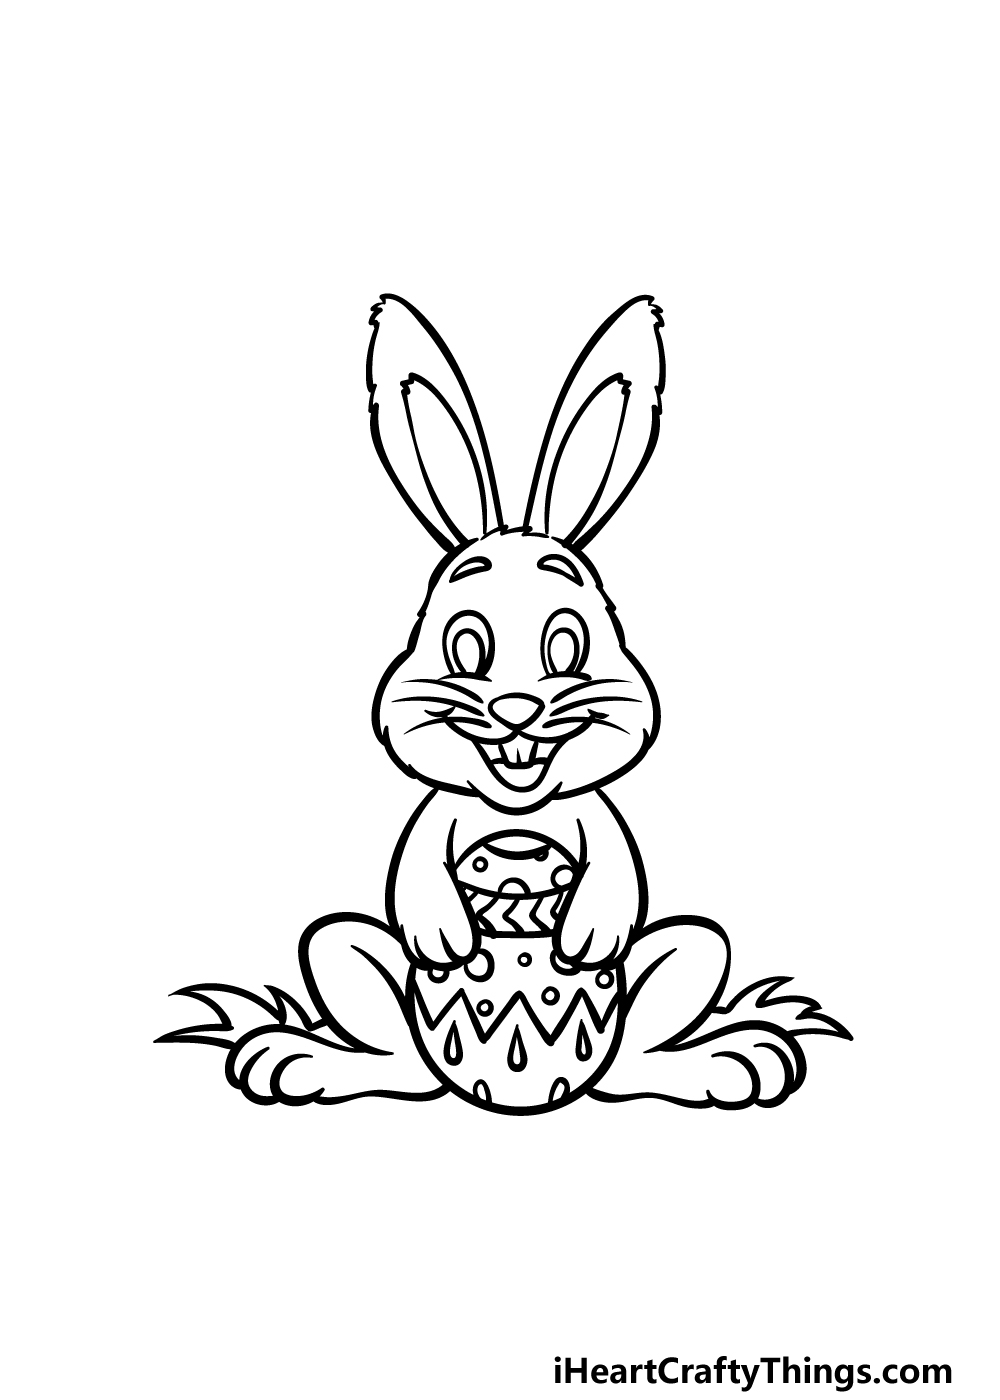
This fifth step of our guide on how to draw the Easter Bunny will be all about finishing up some final details and additions.
First, we added some sharp, pointy jagged lines at the base of the rabbit for the grass that it is sitting on. Then, we added a line to the interior of the mouth to give it some more depth.
Once you have drawn these details, you could also add some additional details of your own!
One idea could be to fill the background with dozens of colorful Easter eggs, and this would really put your creative skills to the test!
How will you finish up this Easter Bunny before we proceed to the final part of this guide?
Step 6 – Finish off your Easter Bunny drawing with color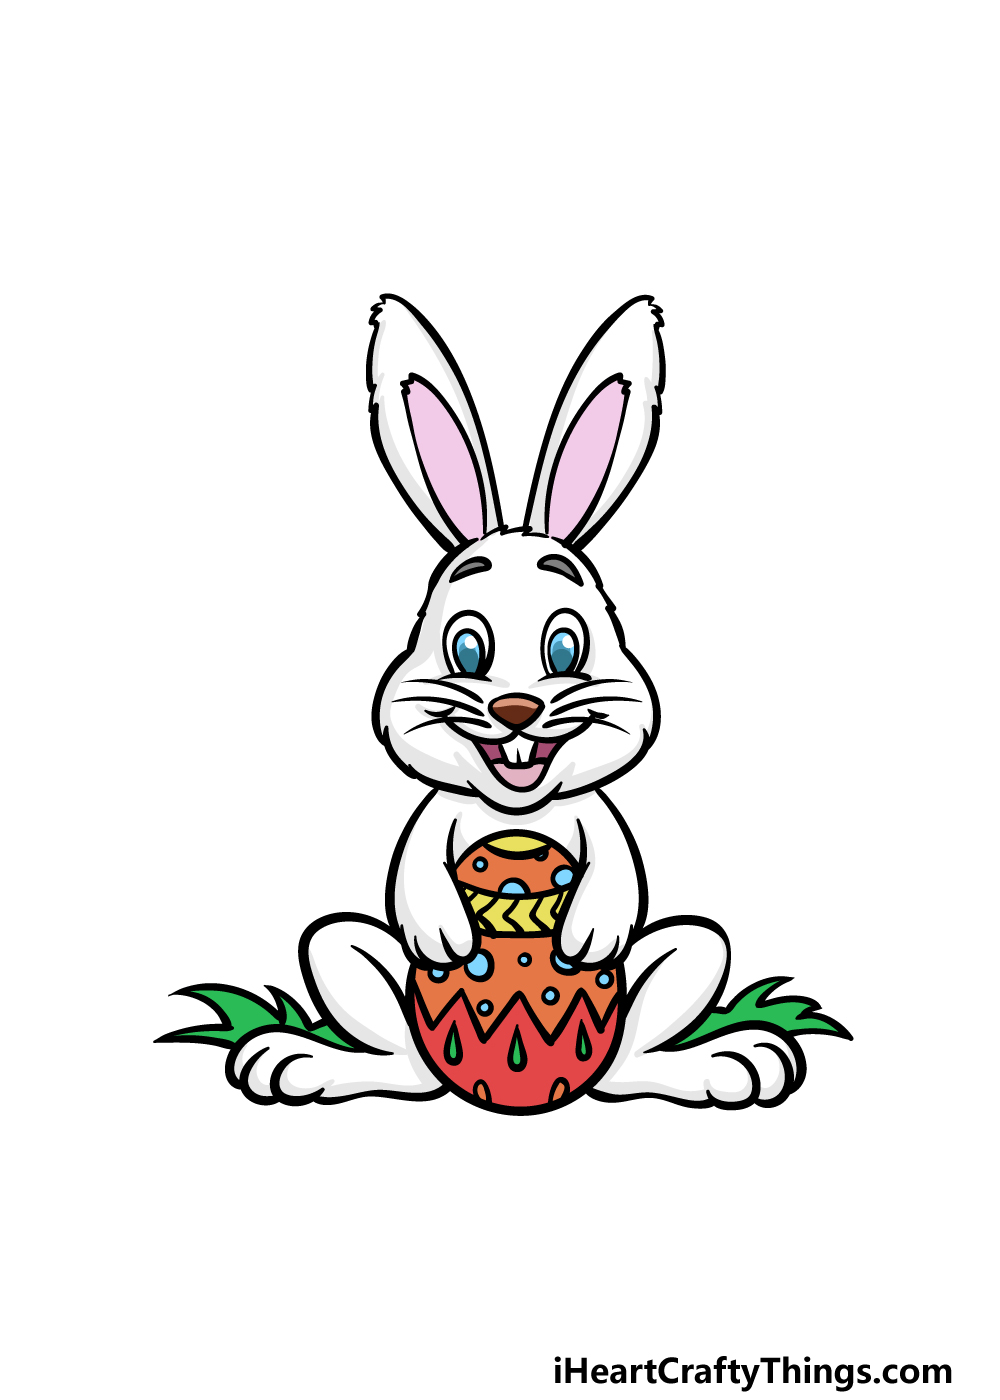
It's now time to have some coloring fun as you truly finish off this image! The color focal point of this image would certainly be the Easter egg he is holding.
We used some warm, bright colors for the egg and then kept the colors of the rabbit a bit more muted in contrast.
You could use any of your favorite colors when coloring the egg and the rabbit! You could also experiment with some art mediums such as paints, colored markers or pens.
What colors and mediums will you use to finish off this Easter creation? We can't wait to see the creative ways that you will go about coloring this amazing picture!
Here's how you can make your Easter Bunny drawing even better…
You won't have to hunt for tips on how to make your drawing even better after this guide!
We love how cute this design of the Easter Bunny is! He is holding onto a giant Easter egg, and it is already beautifully detailed.
That being said, you could also go for a different design for the egg. You could use all kinds of patterns and shapes on this egg as if you were decorating a real Easter egg.
Just this one element of the drawing is a great way to personalize this picture!
Another way to personalize this Easter Bunny drawing is by adding a fun background. One way to do this would be by adding a whole bunch of Easter eggs piled behind him.
Not only would that look great, but it would also give you loads of opportunities for some more patterns and shapes.
You could also add other Easter elements such as a baby chick or maybe some chocolates! What other elements can you think of?
This design of this Easter Bunny sketch is already super cute, but you could add some details and accessories to make it even cuter.
We have a few ideas for such details. Maybe the rabbit could have a bow between its ears, or you could design a little outfit for him to wear!
These are just a few things you could add to the bunny, but there are tons of details you could change and add to make this drawing better still.
Lastly, we think that you can have a lot of fun with this drawing of an Easter Bunny by playing with colors and art tools.
We showed you one way that you can color it in, but you can use any others you like! Whether you're coloring the bunny, the egg or any details that you added, there are no wrong answers for the colors that you could go for.
This is your chance to show off your color creativity, and you could also use some brand new mediums you haven't used before!
Your Easter Bunny Drawing is Complete!
You have made it through all 6 steps of this guide on how to draw the Easter Bunny, and we hope that you had a great time working on it!
This may be the hardest working bunny in the world, but we hope that the steps in this guide made this drawing challenge a breeze for you.
When you have completed this adorable depiction of the Easter Bunny, you can keep the fun going with your own additions and touches.
We mentioned how you can change up the colors and add background details, but what else can you think of to finish it off?
There are many more drawing guides just waiting to be discovered on our website, so be sure to visit us there for more fun! We have plenty more we will be bringing out soon, and you won't want to miss them.
You can also show off how wonderful your Easter Bunny drawing looks by sharing the finished drawing on our Facebook and Pinterest pages!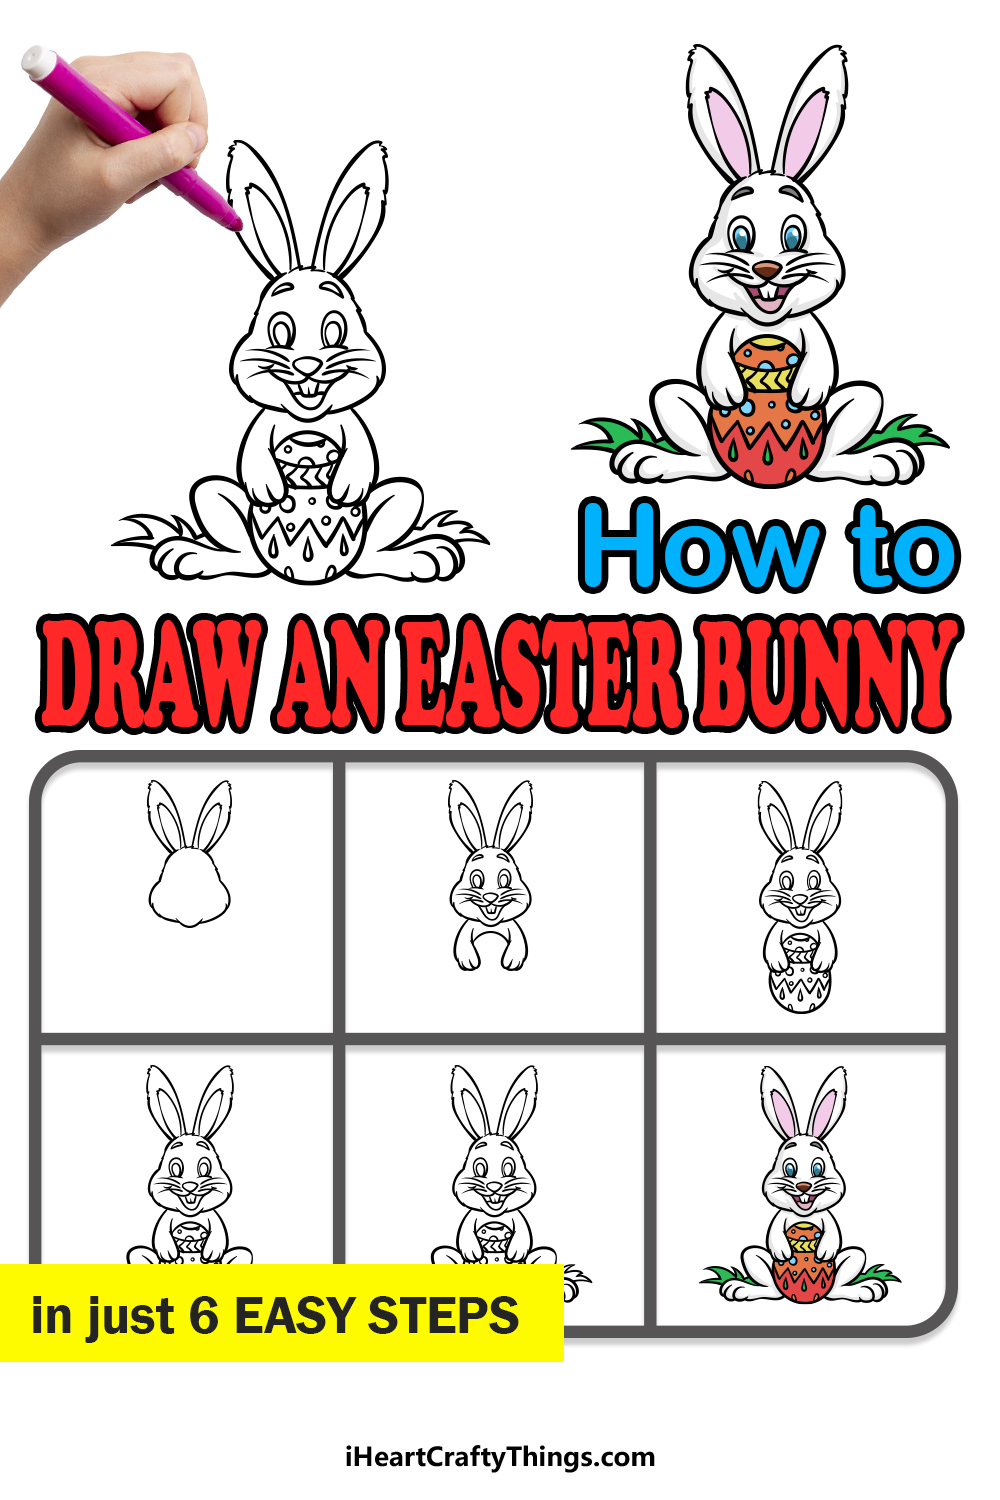
Source: https://iheartcraftythings.com/easter-bunny-drawing.html
0 Response to "Easter Pictures Easy to Draw Easter Pictures"
ارسال یک نظر